Search
Close this search box.

Winds of Change: Defeat of the Spanish Armada, 1588.

Winds of Change: Defeat of the Spanish Armada, 1588.

armada featured image
Expeditionis Hispanorum in Angliam, Plate 1
Expeditionis Hispanorum in
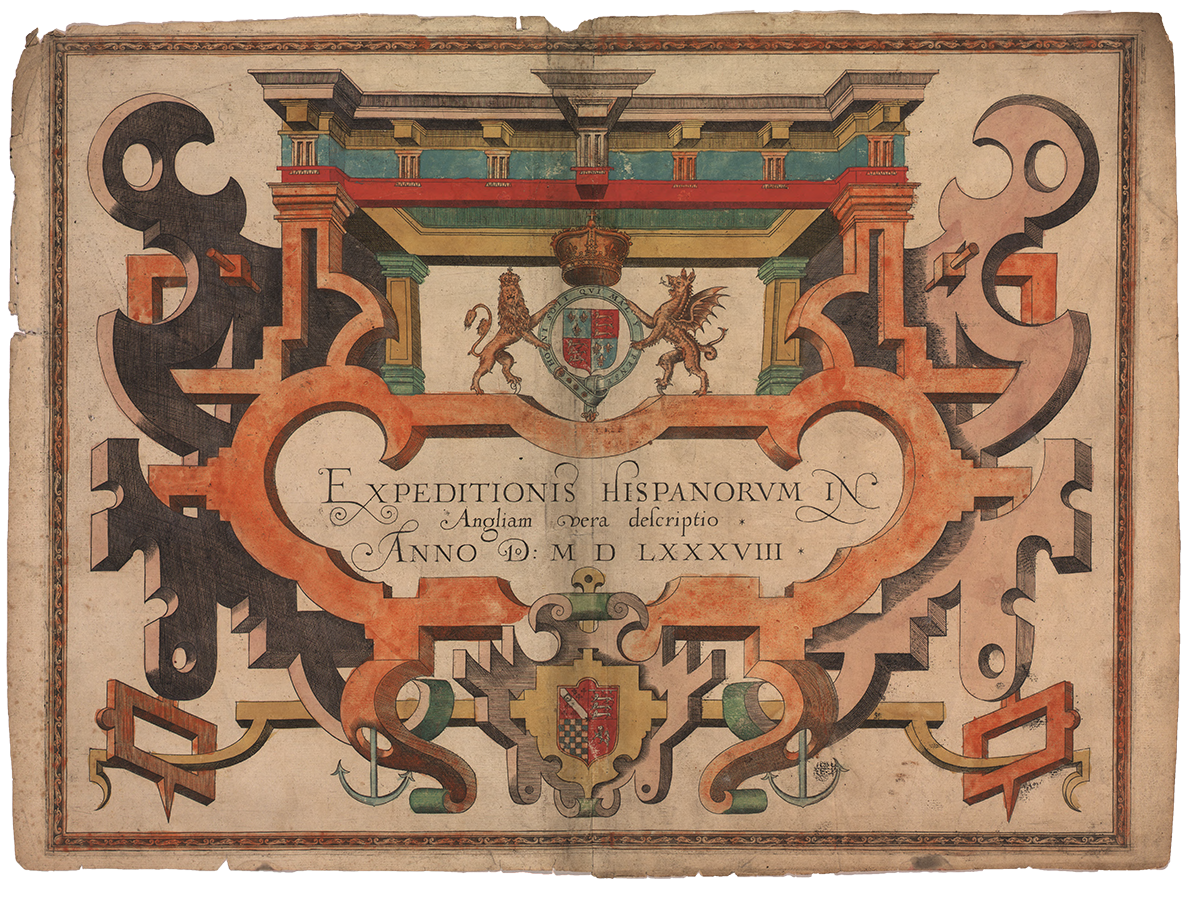
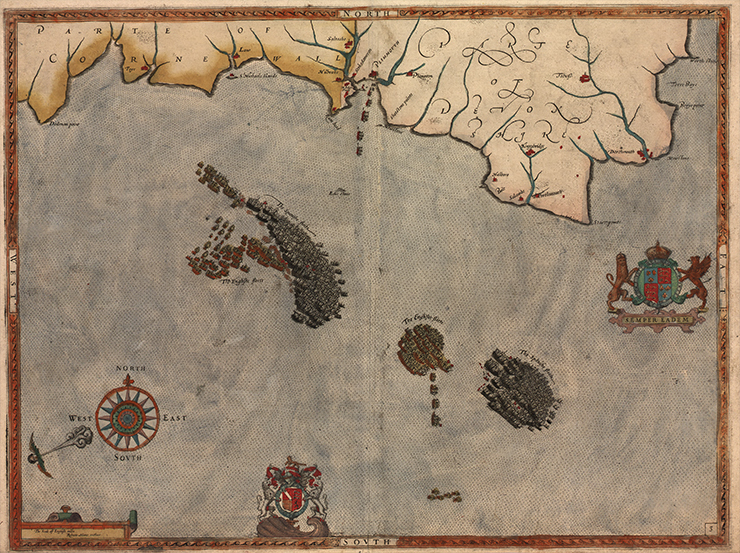
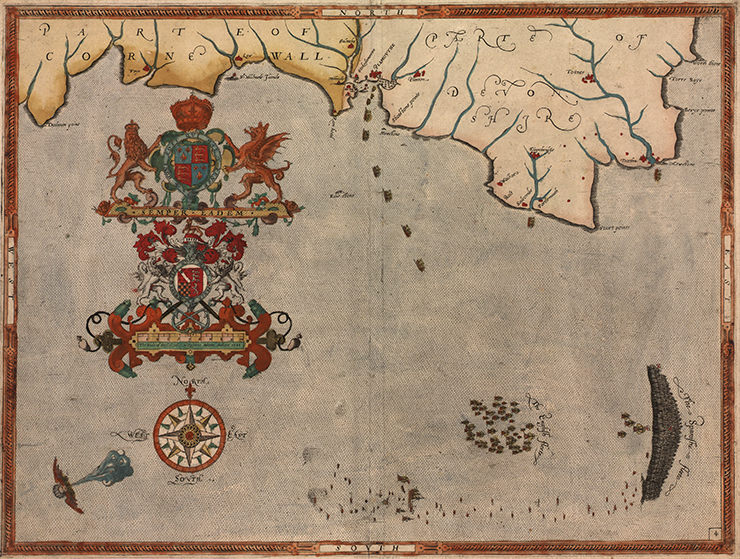
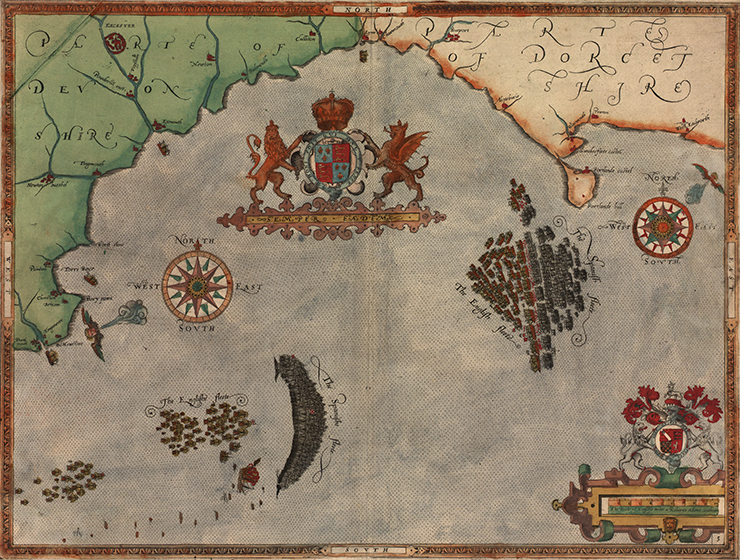
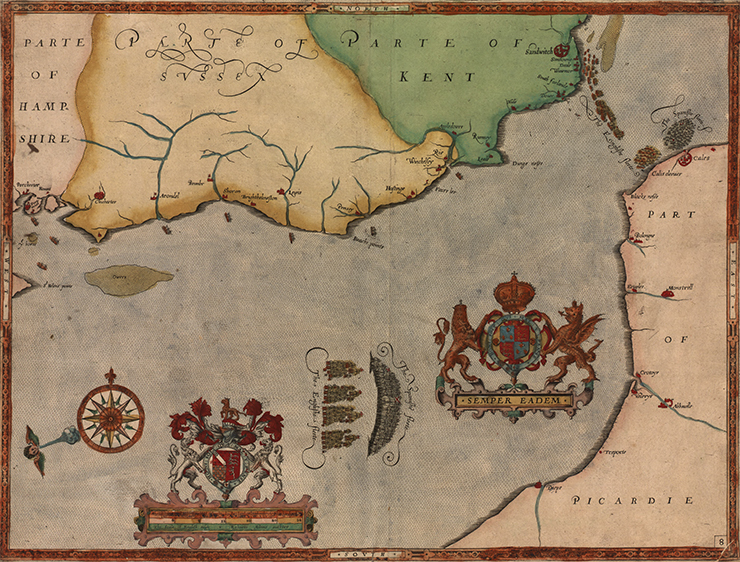
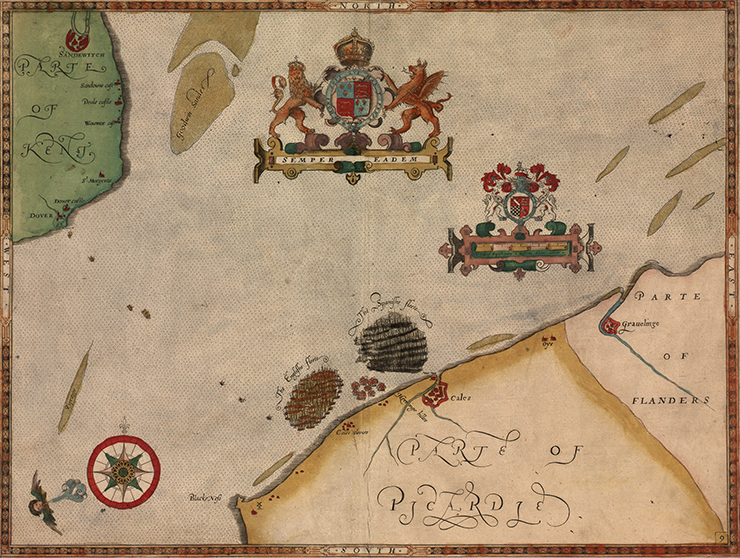
Angliam, Plate 1 by Robert Adams

The series of battles that unfolds with these seven maps is considered one of the most important campaigns in naval history; a campaign that ended with the defeat of the powerful Spanish Armada in 1588. Cartographer Robert Adams created these maps for a 1590 book chronicling the famed naval campaign.

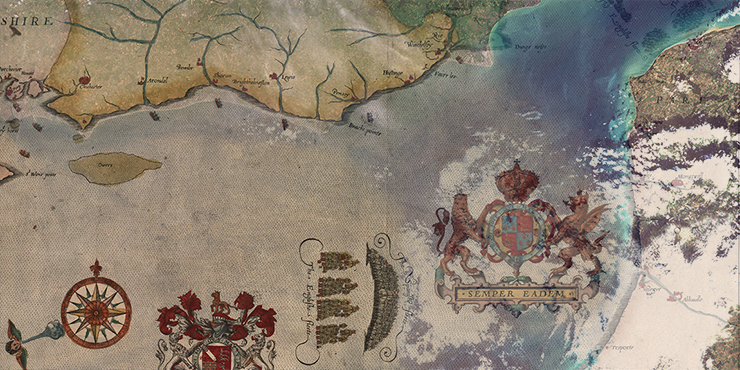
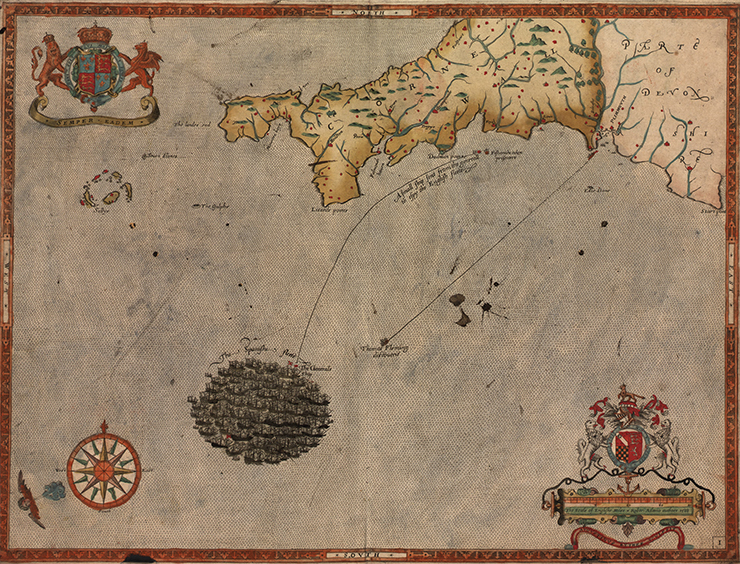
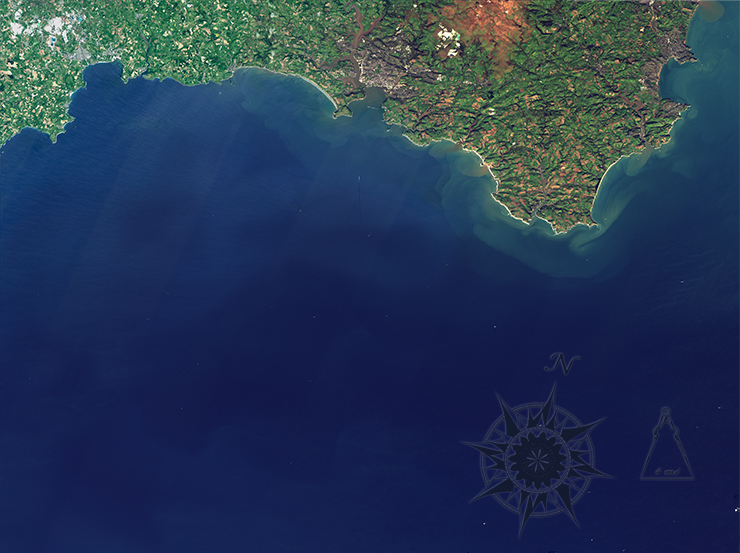
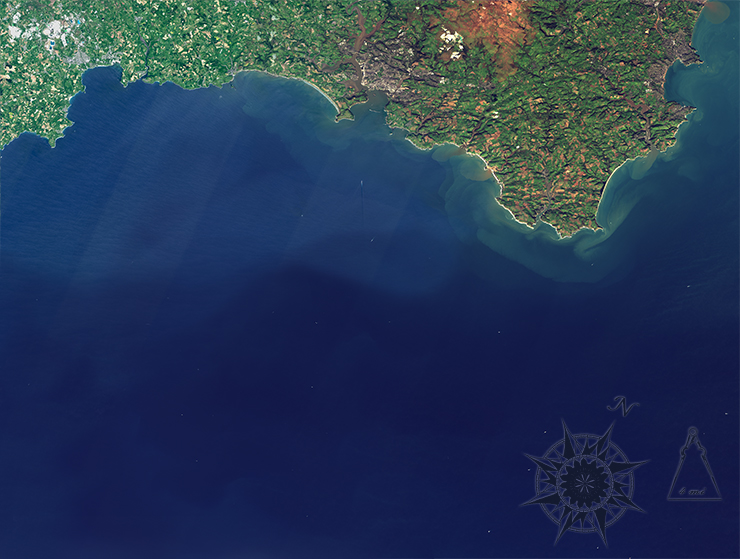
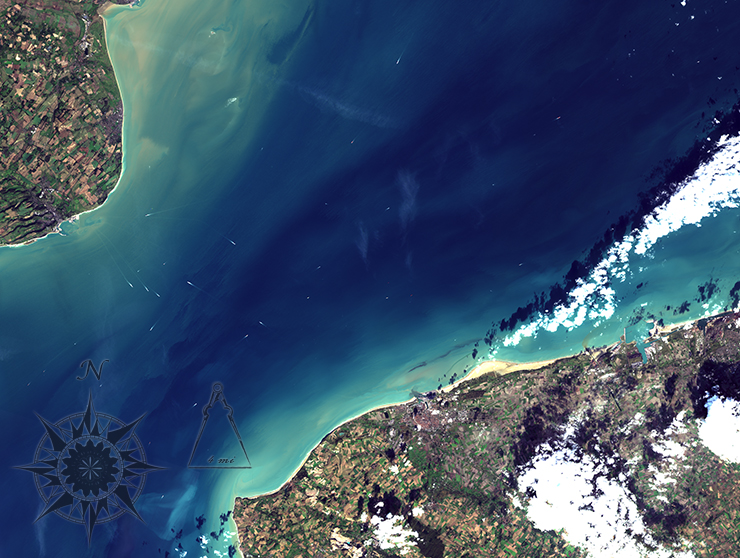
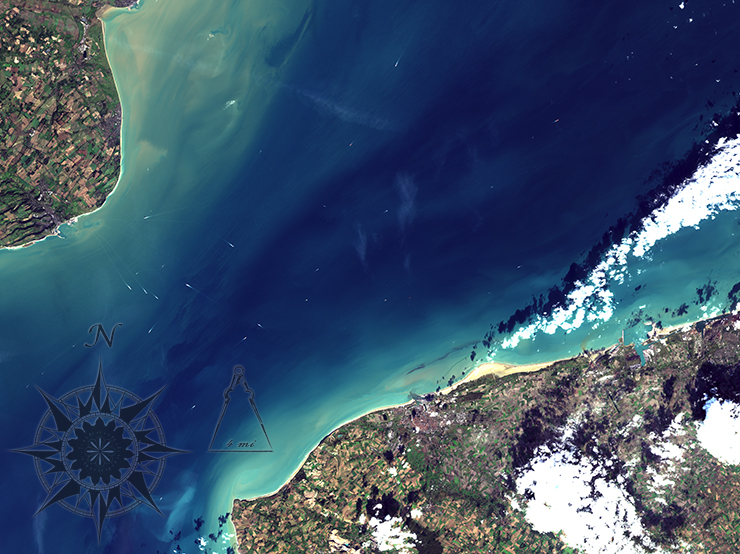
In 1588, Spain was at the zenith of her power, closely allied with the Roman Catholic Church, and home to a powerful Armada or naval “fleet” considered invincible. The massive galleons of the Spanish Armada were virtual floating fortresses, but these square-rigged vessels could only sail with the wind at their back. The English had recently developed smaller ships that could sail closer to the wind (i.e. they didn’t need the wind at their back to proceed forward). These much more maneuverable English ships became an essential element of the confrontation. As you watch the battle unfold across these historical maps, note that wind direction is included on each map.

Setting the Stage for Battle

After decades of bad relations, King Phillip II of Spain, a staunch-Catholic and widowed husband of Queen Mary I of England—Elizabeth I’s half-sister—decided to launch an attack on Elizabeth’s Protestant England.

The Spanish Armada left Lisbon for England in May 1588 after years of preparation with 132 vessels, more than 20,000 troops, 8000 sailors, and 2500 guns. They traveled—with good winds—an average of 2.5 knots (less than 3 miles) per hour.

The fleet was under the command of the Duke of Medina-Sidonia, a well-respected nobleman with no military training. King Phillip II had chosen him to replace the recently deceased General Santa Cruz. The Spanish vessels under Medina-Sidonia’s command included huge Portuguese galleons, armed merchant ships, and boats built for the Mediterranean such as Neapolitan galleys with oars pulled by convicts. The galleys were not designed for rough seas of the north and three of the four galleys perished on the French coast after a squall en route to England. The Armada also had four hybrid ships called galeases with both masts and oars, designed to have the strength of the galleons, but maneuverability of the galleys. (Close inspection of the maps shows these galeases in the Armada formation.)

Given severe squalls and the Armada’s slow pace, the fleet did not reach the southern coast of England until mid-July. Meanwhile, all English ships had been gathered—both military and armed merchant ships. In total, nearly 200 (mostly small) ships carrying ~17000 sailors were at the ready. A hundred of these vessels were at Plymouth and the other hundred were helping the Dutch blockade Flemish ports where the Duke of Parma and his contingent of the Spanish army were located. Many of the English ships were the new form of fast ship that could sail close to the wind with increased maneuverability.

Battling Begins

Expeditionis Hispanorum in Angliam, Map 1

Just after arriving south of the Isles of Scilly, Thomas Fleming, a Scottish privateer, sighted the Armada south of Lizard Point and raced back to Plymouth to inform the English naval commanders stationed there.

Landsat image 2013
Expeditionis Hispanorum in Angliam, Map 1

Expeditionis Hispanorum in Angliam, Map 2

The English fleet confronted the Armada as it neared Plymouth. The English fleet was nimble and quick. It was able to avoid all boarding attempts by the Spanish, but it lost a lot of ammunition with failed long-distance shots, which merely damaged replaceable Spanish rigging. The tall and imposing Spanish galleons were hard to damage at long range.

Landsat image 2013
Expeditionis Hispanorum in Angliam, Map 2

Expeditionis Hispanorum in Angliam, Map 3

King Phillip II had instructed General Medina-Sidonia to land the Armada in Kent where it could be joined by infantry serving in the Spanish Netherlands under the Duke of Parma. As the Spanish Armada moved eastward towards Kent, the English gave pursuit and multiple battles ensued. When amassed in a crescent formation for battle, the Armada stretched seven miles from end-to-end.

Expeditionis Hispanorum in Angliam, Map 3

Expeditionis Hispanorum in Angliam, Map 4

Battles during the English pursuit included battle of Portland. Here, the winds shifted to the northeast, enabling the Armada to turn towards the English fleet and attack. The English fired at close range, but still not close enough to inflict substantial damage. The Spanish, meanwhile, were unable to get close enough to the nibble English ships to board them. By the end of this hot, but indecisive battle, the English were out of ammunition and had to return to port to resupply.

Landsat image 2013
Expeditionis Hispanorum in Angliam, Map 4

Expeditionis Hispanorum in Angliam, Map 5

A week after the battles began, the Spanish fleet anchored at Calais so that General Medina-Sidonia could wait to hear the status of the Duke of Parma’s infantry. The response came back that the English and Dutch blockade made the participation of Parma’s infantry impossible.

Landsat image 2013
Expeditionis Hispanorum in Angliam, Map 5

Expeditionis Hispanorum in Angliam, Map 6

While waiting there, the English sent eight fire ships—vessels loaded with incendiaries and set on fire—flaming into the Spanish anchorage. This savvy tactic panicked the wooden fleet and many ships cut their anchor lines in the rush to escape.

Landsat image 2013
Expeditionis Hispanorum in Angliam, Map 6

Expeditionis Hispanorum in Angliam, Map 7

The English pursued the Spanish fleet eastward and a great battle took place off the coast of Gravelines. Having learned from their failed long range firing in earlier battles, the English fleet got very close to the Spanish fleet and fired at short range, badly damaging many, and sinking some. Since the Spanish were trained to board enemy ships and fight man-to-man, their cannons were not designed to be fired repeatedly. While the Armada had sailed with 2500 guns, many were intended for a ground assault after landing and were useless for naval battles.

Landsat image 2013
Expeditionis Hispanorum in Angliam, Map 7

At this point, General Medina-Sidonia and his men realized they were outgunned and out-sailed by the English fleet. Medina-Sidonia decided the only option was to return to Spain. The mighty Spanish Armada had been defeated. The story doesn’t end there, however. The winds were southerly (blowing from the south) and the English fleet was blocking the channel, so the Spanish fleet’s only option was to head northward up the coast of Scotland and to come back down the Irish coast to return to Spain. The English pursued the Armada to the Firth of Forth. Badly damaged and with diminished supplies, the Spanish entered the treacherous North Sea. Unusually rough gales hounded the fleet as they journeyed home and many ships crashed into the Scottish and Irish coasts, not having anchors to use to wait out the storms. The Spanish Armada returned home defeated with only half of its ships and one-quarter of its troops.

Today

Looking at the serene Landsat 8 images featured next to Adams’ maps, it is hard to imagine the monumental scope of the naval campaign that took place in these waters more than four and a half centuries ago. The English defeat of the Spanish Armada is often considered the marking point of the medieval world’s end and modern world’s beginning.

References:

Expeditionis Hispanorum in Angliam vera descriptio. Anno Do: MDLXXXVIII.” Library of Congress. Accessed 30 January 2014. “The Spanish Armada, 1588.” Luminarium: Encyclopedia Project. Accessed 30 January 2014. “Spanish Armada Defeated.” History. Accessed 30 January 2014. Adams, Simon. “The Spanish Armada.” BBC History. Accessed 30 January 2014. Rasor, Eugene. “The Spanish Armada of 1588.” Greenwood Press. Accessed 30 January 2014. “The Spanish Armada.” BritishBattles.com Accessed 30 January 2014.   Images created using Landsat 8 OLI bands 4,3,2 The images were collected between May and October of 2013. Images by Mike Taylor using Landsat data available from the USGS archive. Caption by Laura Rocchio.  

On Key

Recent Posts

1911 USGS map

Creating an Oasis in the Desert: Lake Havasu City, Arizona, 1911

Parker Dam was constructed on the California-Arizona border on the lower Colorado River during the 1930s, as part of a project to employ people during the Great Depression, to generate electricity, and to provide water that could be pumped into aqueducts for agricultural, industrial, and residential use in other parts of Arizona.

Read More »
Cape Cod map 1885

Cape Cod, 1885

The sandy peninsula of Cape Cod, Massachusetts juts into the Atlantic Ocean with its characteristic crook and twirl in both images: “Balloon View–Nantucket to Boston” made in 1885, and a Landsat 8 satellite image made 129 years later in 2014. Aspirations to rise above the Earth and to record the Earth’s surface from there are a long-standing theme of human culture.

Read More »
On Key

Related Posts

1911 USGS map

Creating an Oasis in the Desert: Lake Havasu City, Arizona, 1911

Parker Dam was constructed on the California-Arizona border on the lower Colorado River during the 1930s, as part of a project to employ people during the Great Depression, to generate electricity, and to provide water that could be pumped into aqueducts for agricultural, industrial, and residential use in other parts of Arizona.

Read More »