
STELLA 1.1 - Quick Start Instructions
This guide walks you through the basic steps of operating a STELLA-1.1 spectrometer.
Setting Up
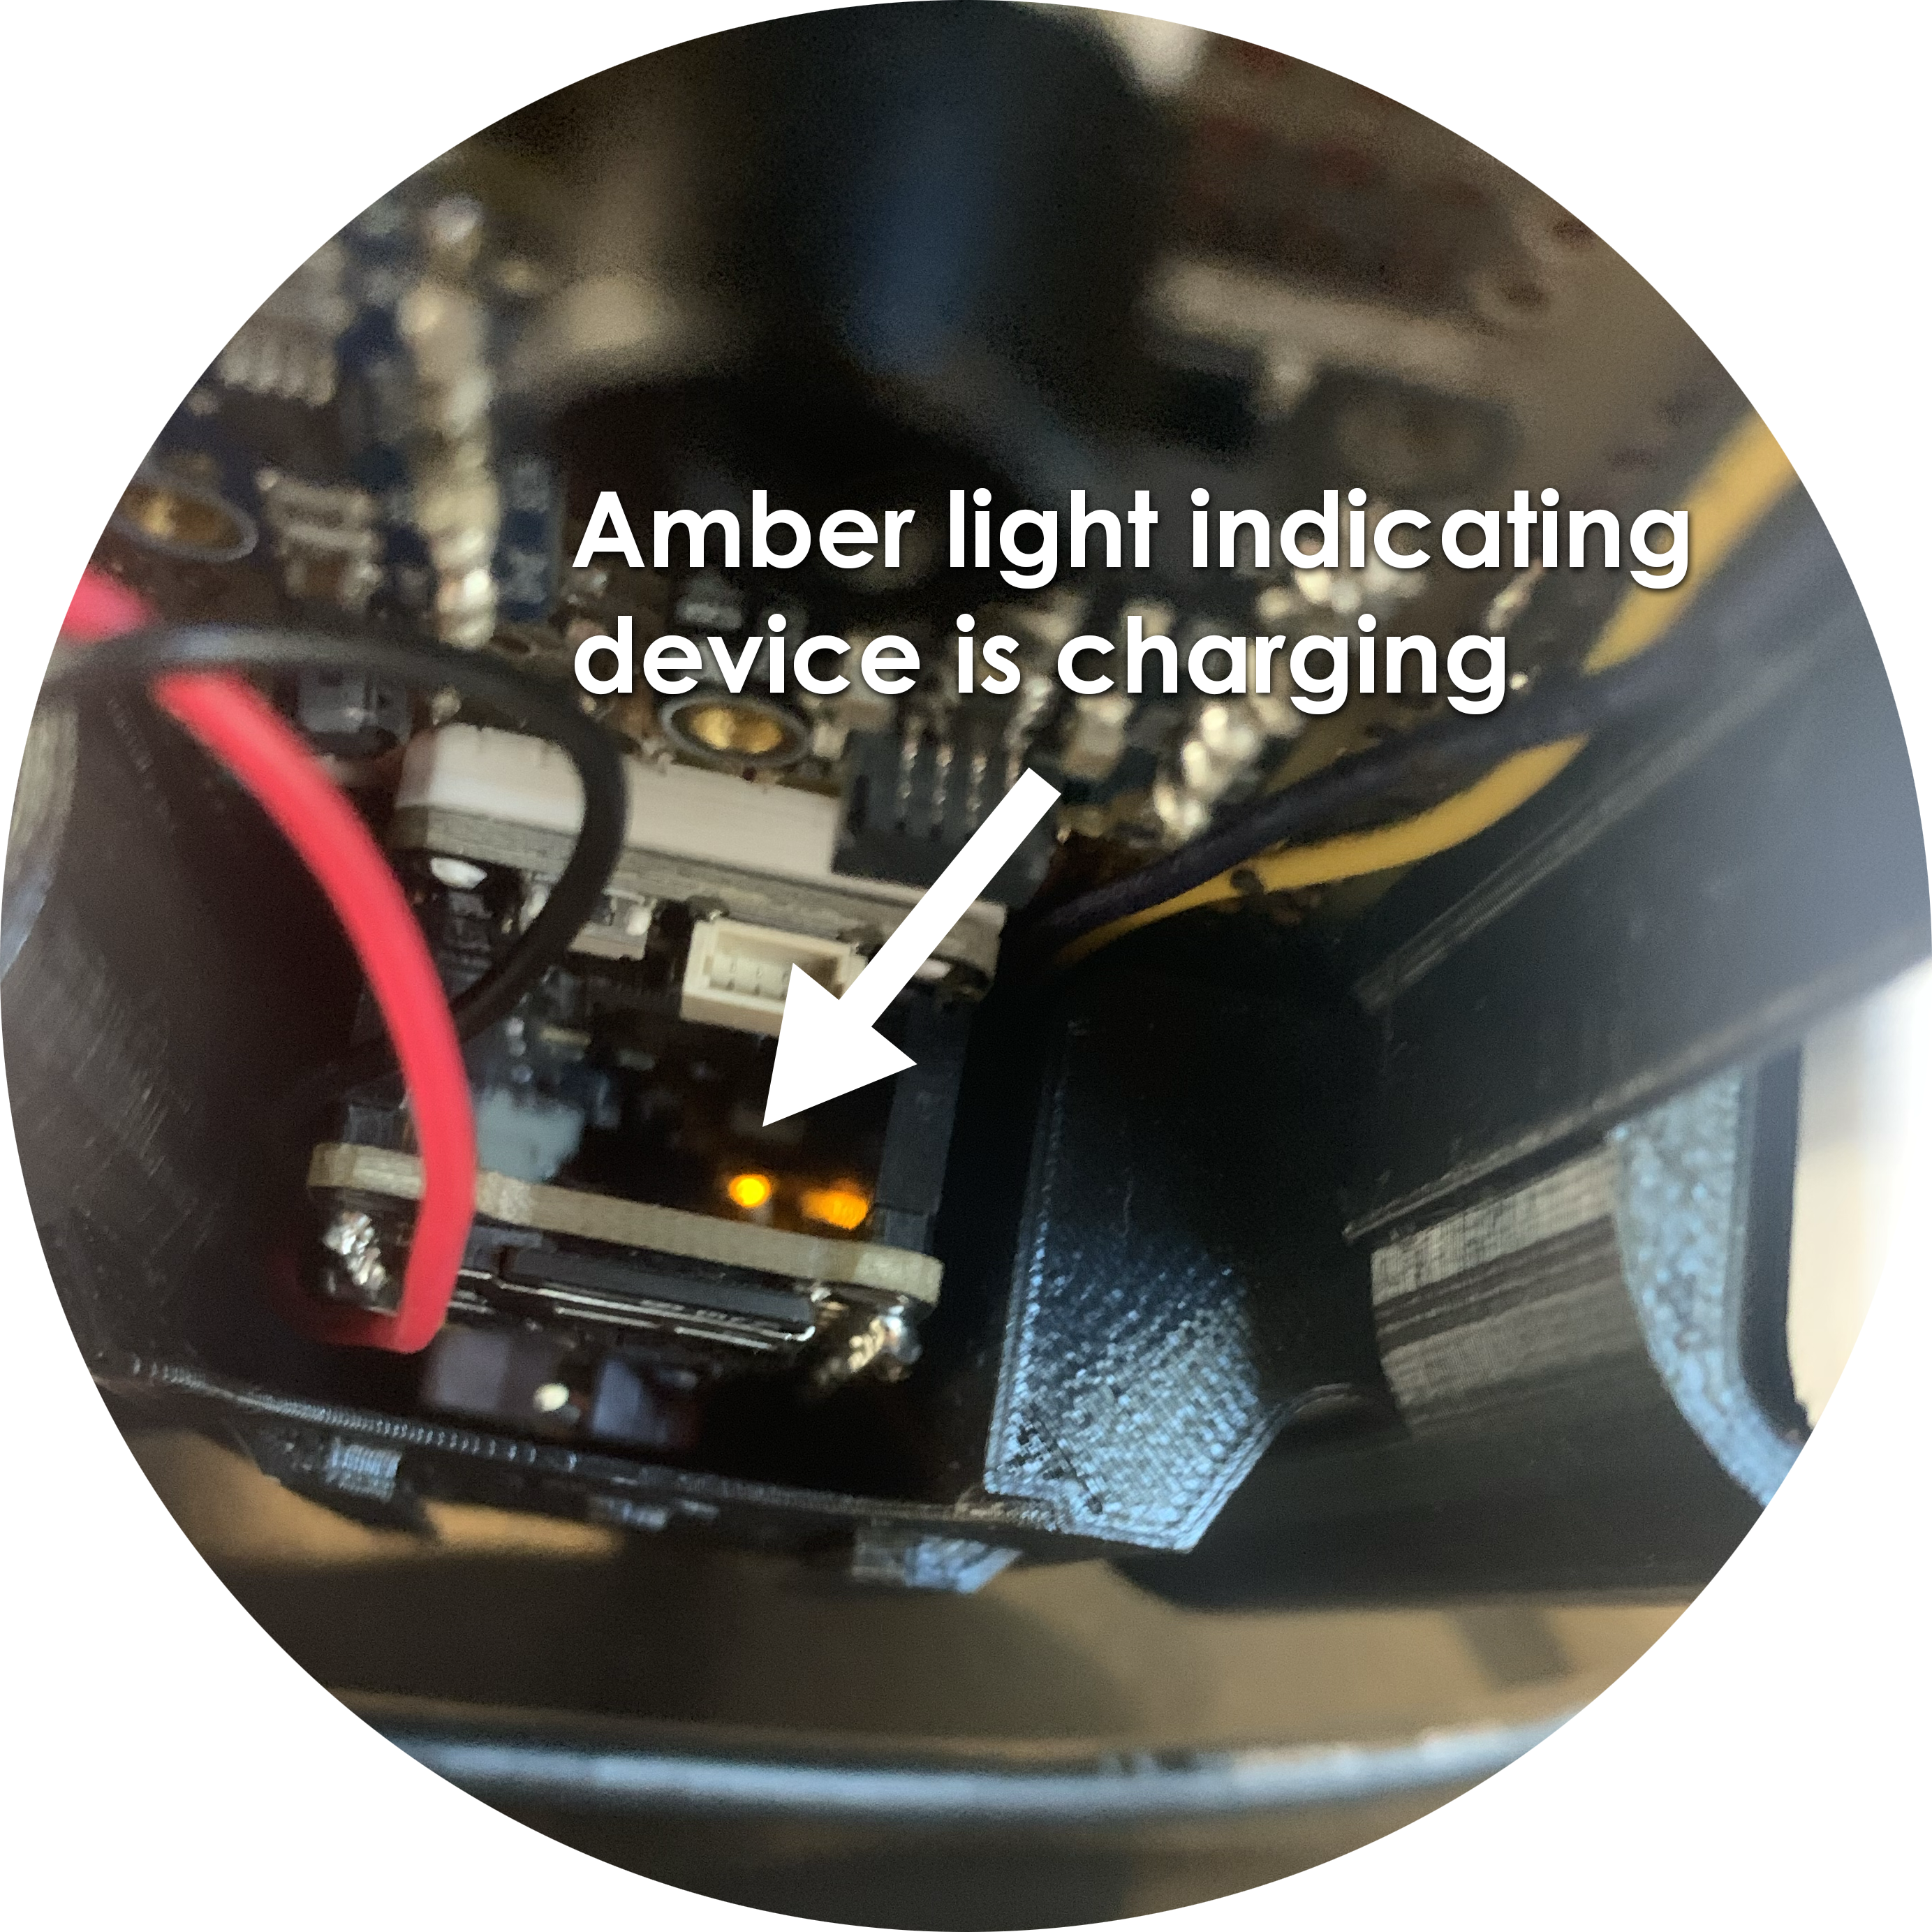
Charging the Device
Connect the device to a USB-C port with a USB-C cable. The amber light next to the USB-C port inside of the housing will turn off when the battery is fully-charged. The battery will charge whether the device is turned on or off.
Setting the Date and Time
- STELLA units are programmed to collect data in Coordinated Universal Time (UTC).
- Hold the Push button during power-up until you see the clock set screen, then release the button.
- Select a field to set by pressing the screen near it; then press the up or down arrows to change the value by adding or subtracting 1. For minutes and seconds, the up button increases the value by 10, while the down button decreases the value by 1.
- Once the date and time are set, hold the Push button to reboot the device into instrument mode.
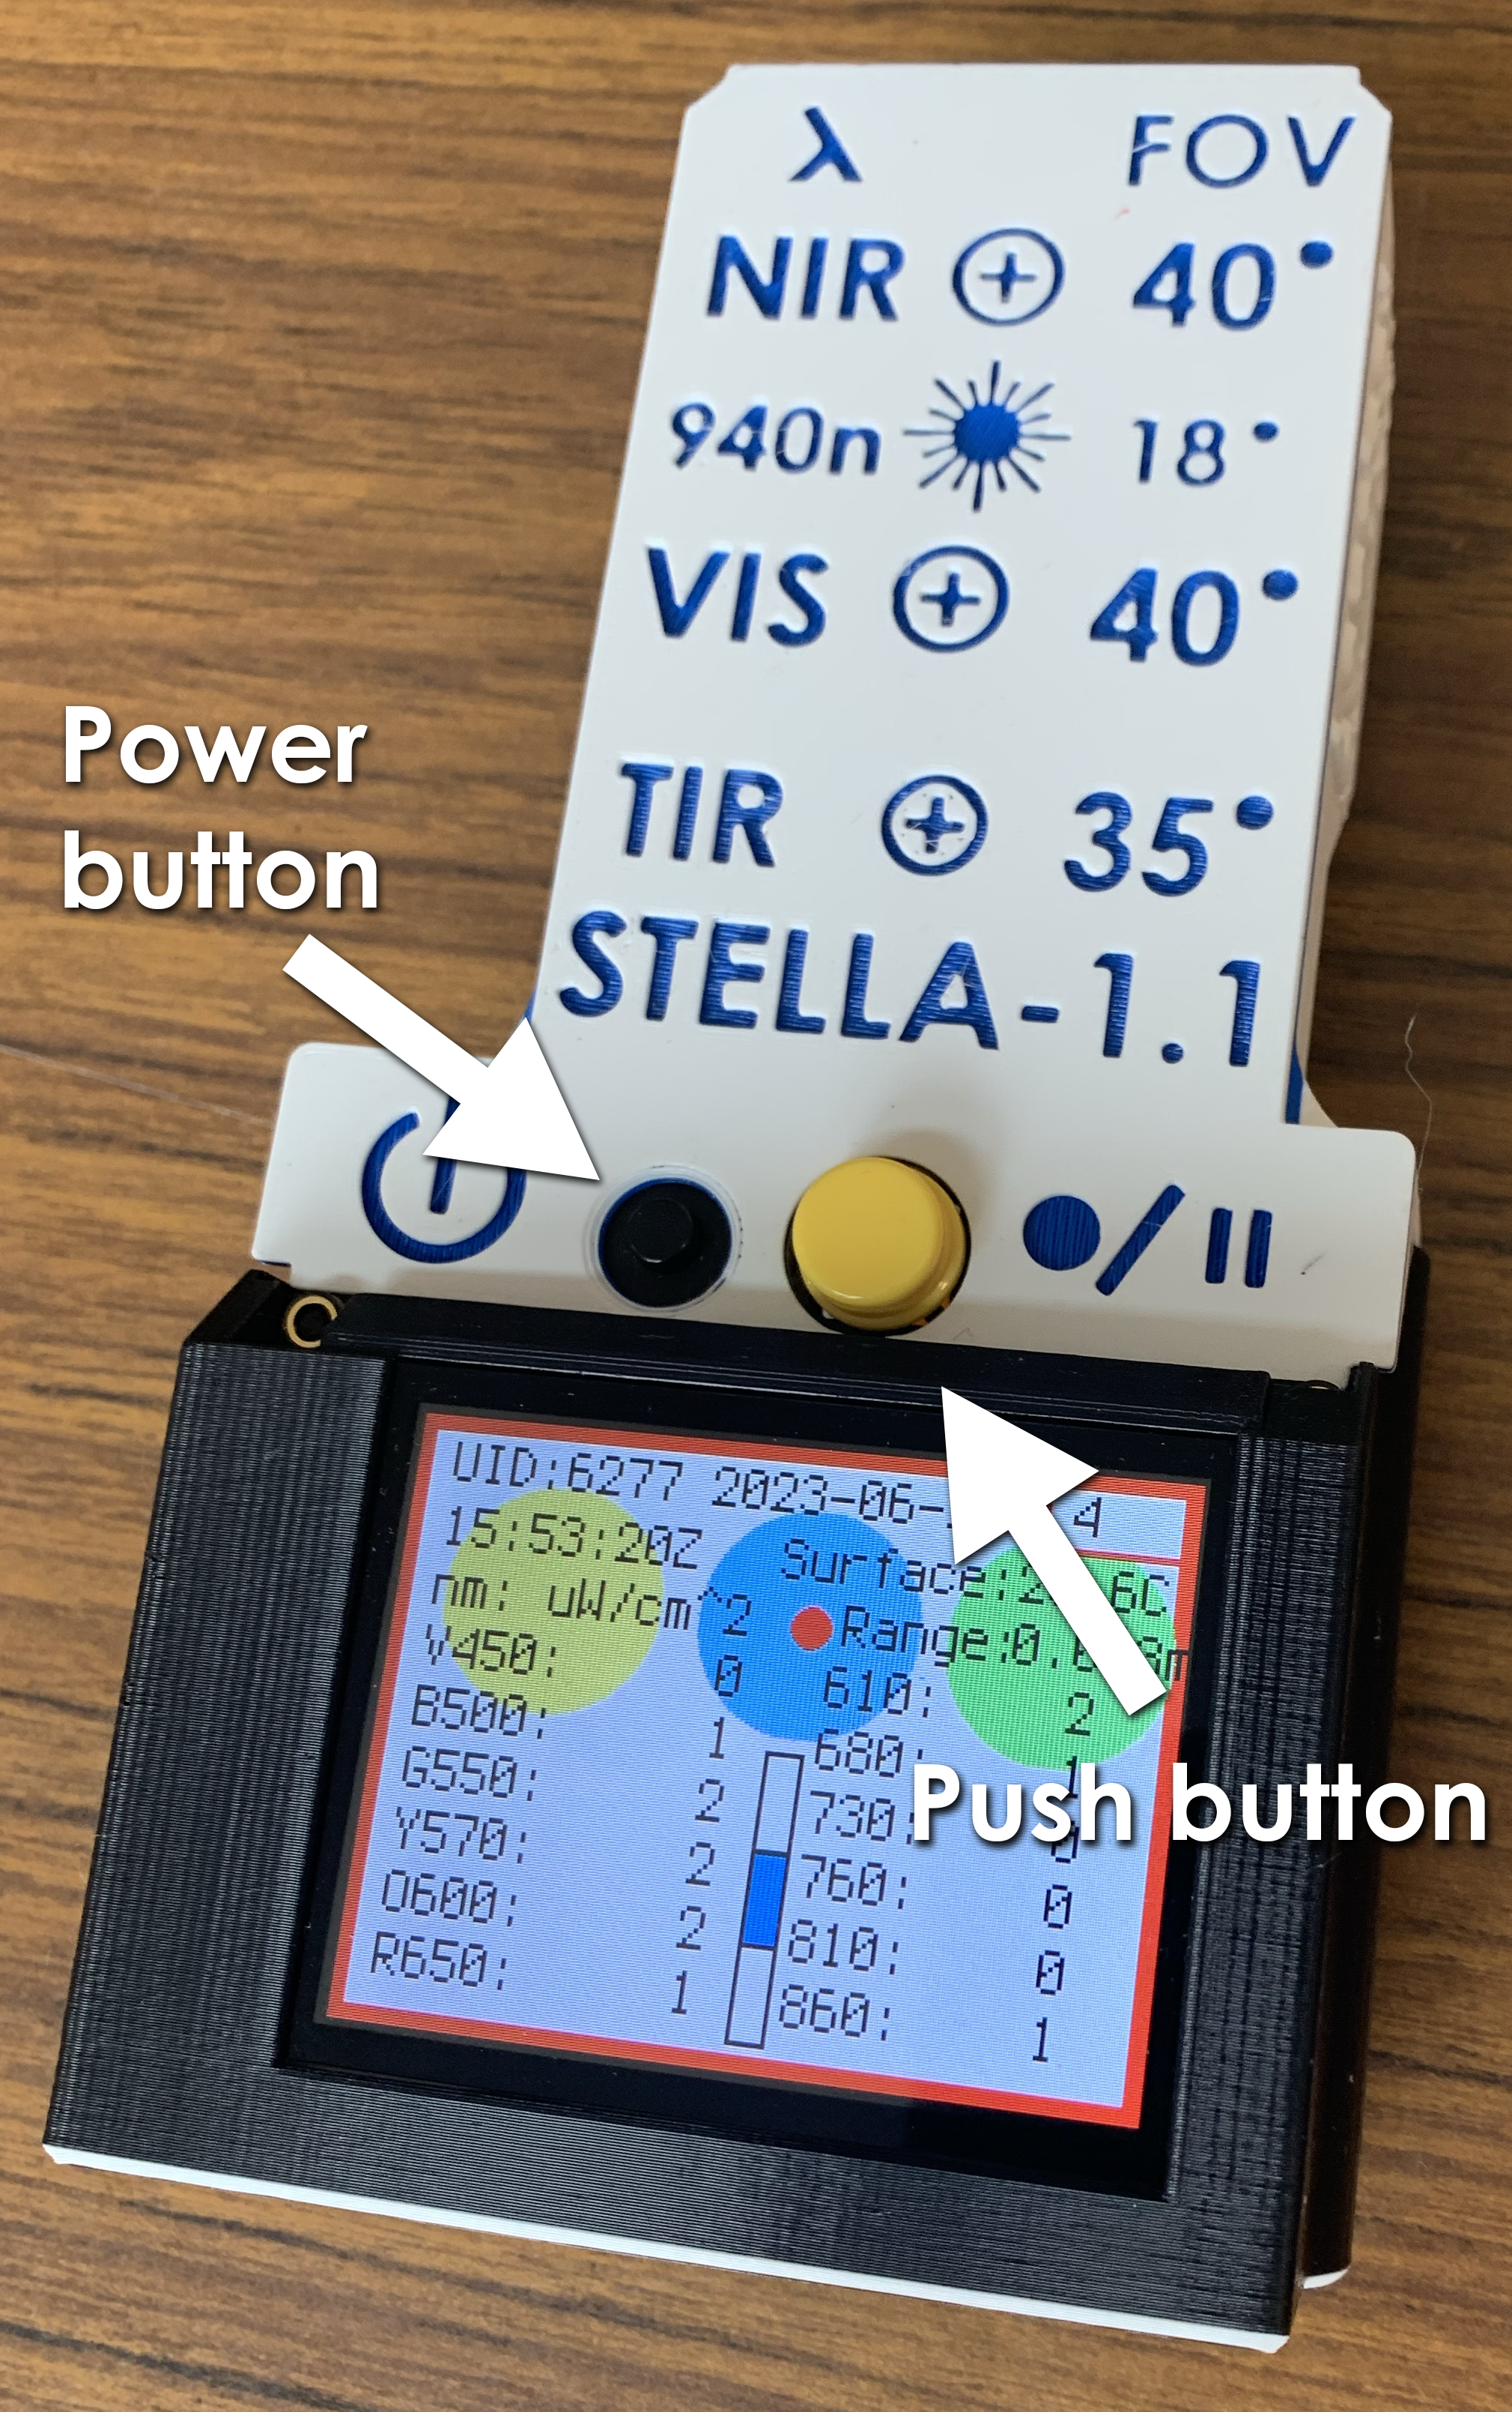
Spectrometer Display
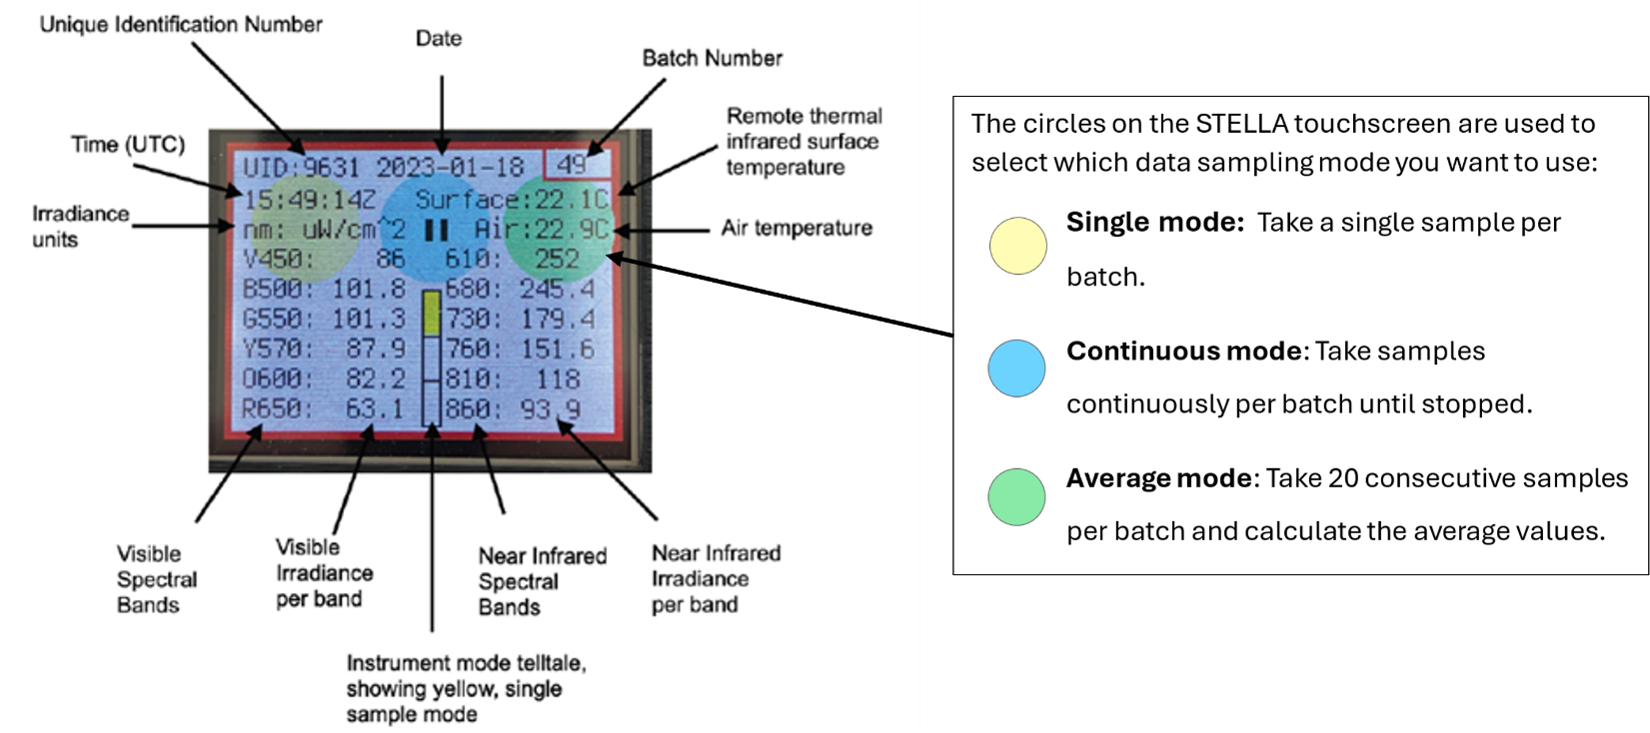
The screen on the STELLA-1.1 spectrometer displays information including date, time, air and surface temperature, and irradiance for each visible and near-infrared band.
Collecting Data with STELLA
1. Prepare for data collection
Before getting started collecting STELLA data, ensure the device is charged and that the time is set correctly, and gather any other necessary materials, such as a notebook and a camera.
2. Insert the microSD card
Insert the microSD card into the back of the device and press down gently until you hear a click. The red light at the bottom of the unit will continuously flash if it is on and the card is inserted properly.

3. Power the STELLA on
Press and release the power button. The display will show a welcome screen while the system is booting up. When the device is ready to use, the instrument table will appear.
4. Choose your data collection sampling
Select your desired data sampling mode by pressing the corresponding colored circle on the touchscreen.
5. Position the STELLA above the target.
Position the STELLA horizontally above the target so that the sensors are held a few inches away from the target.
Note: STELLA’s Field of View (FoV) is 40°, so the area of measurement can be almost as wide as the distance between the device sensors and the target.
6. Take a sample measurement.
Press the Push button to take a measurement. The red light will flash when a data point is recorded. The number of samples collected will depend on what mode you have selected:
Single mode (yellow) will collect a single sample per batch each time the Push button is pressed.
Continuous mode (blue) will collect continuous samples at one-second intervals. The red light will flash continuously while collecting samples. Press the Push button again to stop sample collection.
Average mode (green) will collect 20 samples over a duration of ~10 seconds and record the average. The red light will flash, and the screen will display a countdown as each sample is collected.
Note: The red light will flash when a data point is recorded, and your measurement will display on the touchscreen. If the red light stays on, the SD card is either corrupt or inserted incorrectly.
Tip: To maximize the quality and consistency of data collected in the field, it is important to remember a few key points:
- Keep the device steady during data collection! If the STELLA moves while the device is collecting data, delete the bad data and re-take the measurement.
- STELLA data should be collected under stable lighting conditions, avoiding clouds and shadows which can cause changes in incoming solar radiation. Full sun conditions, typically between 10am and 2pm, are ideal.
- Be sure to write down important observations for each measurement such as: distance and angle between the sensor and the target, light conditions, location (latitude/longitude), and any additional useful information. Taking photos of the target and set-up is also good practice.
- When taking measurements, it is best practice to “sandwich” each observation between a reference collection. More information about this and other best practices can be found in the STELLA Technical Details.
Viewing STELLA Data
Use the STELLA Data Viewer to view and analyze STELLA data. To import data into the Data Viewer, you can either upload data using the microSD card or connect the STELLA device directly with a USB-C cable.
Note: The DataViewer works best in a Chrome browser.
Additional Resources
The activities page provides activity ideas for using STELLA devices for outreach and education.
